2.2.2. Project Details Screen
The Project Details screen contains several sections that allow you to perform general load testing procedures.
The contents of the screen will change according to the data source selected when the project is created.
- The basic project information can be checked and edited. Deletion of the project itself can also be performed from here.

- This is only displayed when
Loggingis selected as the data source. - You can check the number of access logs received from the server under test. For details, please refer to
"2.4.Confirmation of log receipt".

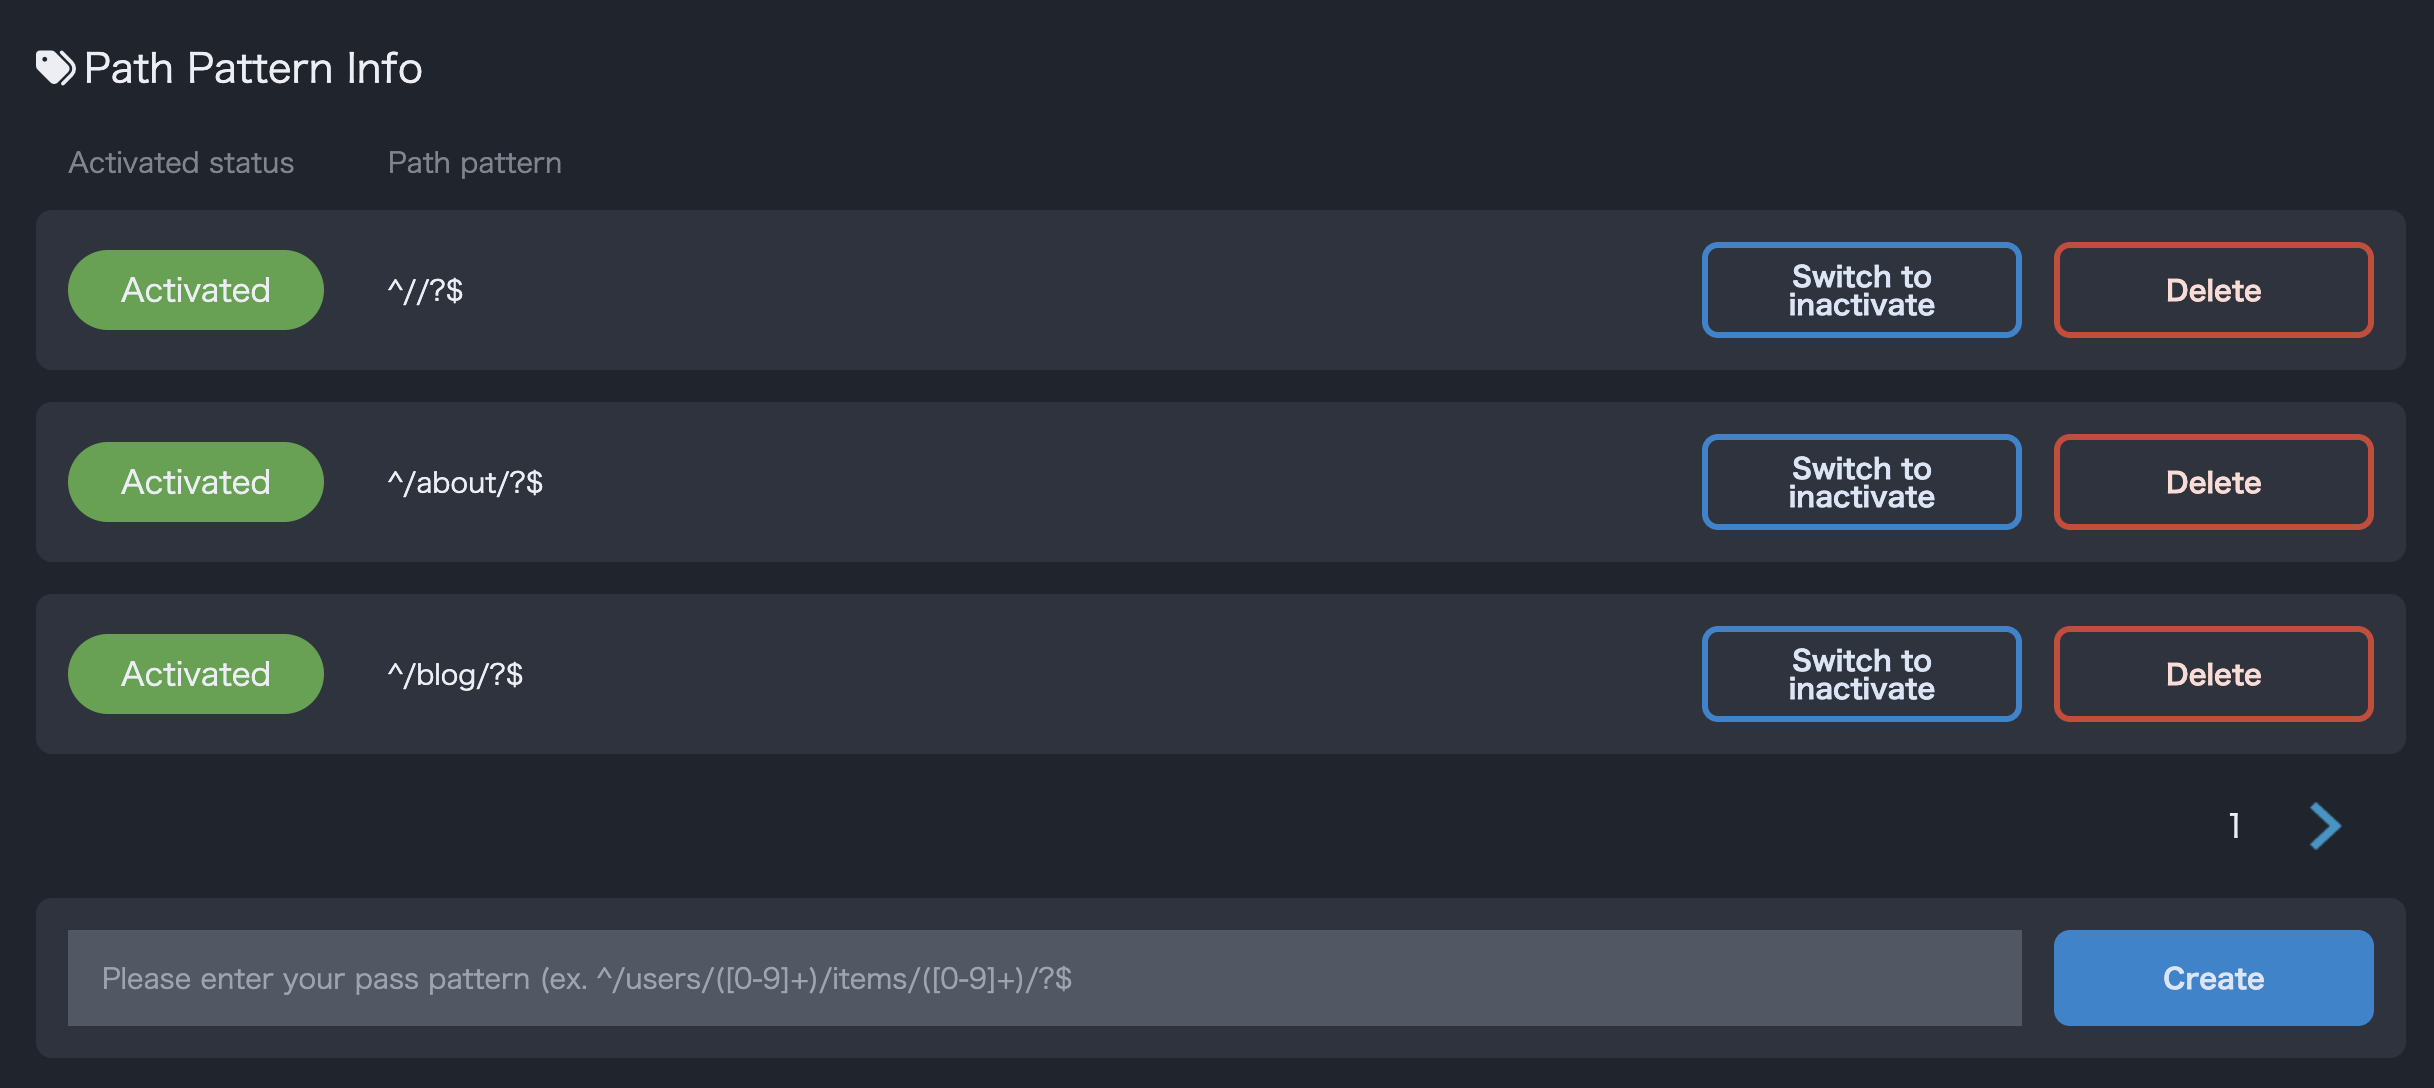
- This is only displayed when
Loggingis selected as the data source. - You can check and delete path patterns, and enable/disable them. For details, please refer to
"3.1.Path-pattern"
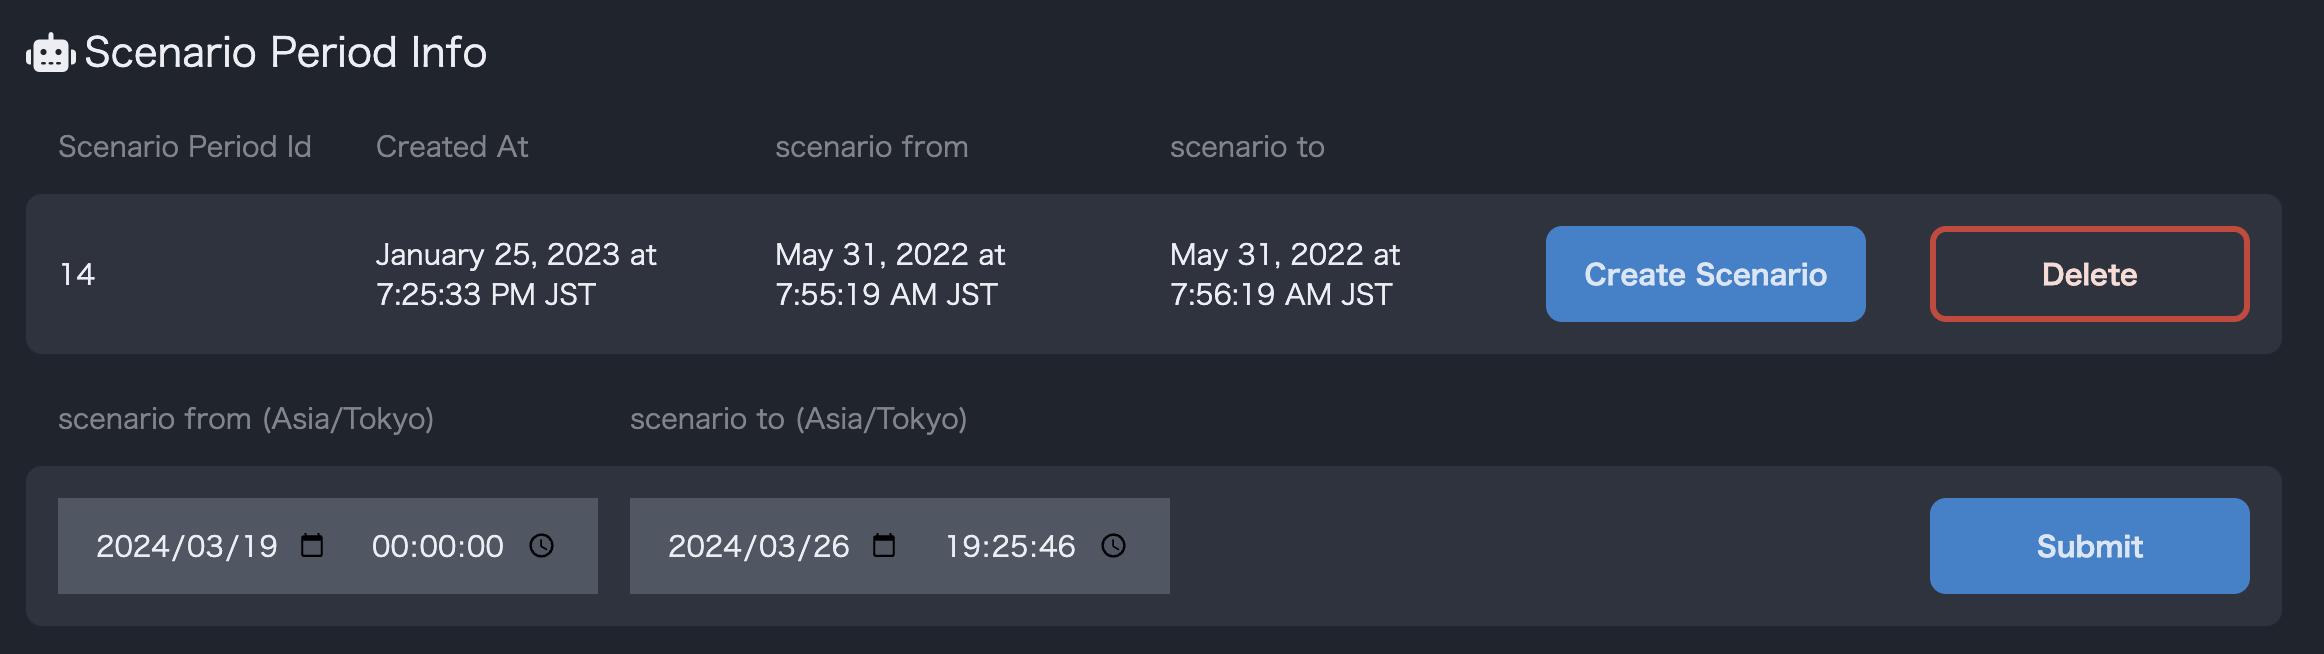
- This will be displayed only when “Crawling” is selected for
Data Source. - You can check the past crawling process in the list. You can also move to the detailed crawling screen and create a scenario from the crawling results.
- You can also start a new crawling.

- You can create new scenarios, delete scenarios, and edit existing scenarios. You can also customize a specific scenario. For more information on how to customize a scenario, please refer to
"3.3.Edit scenario"
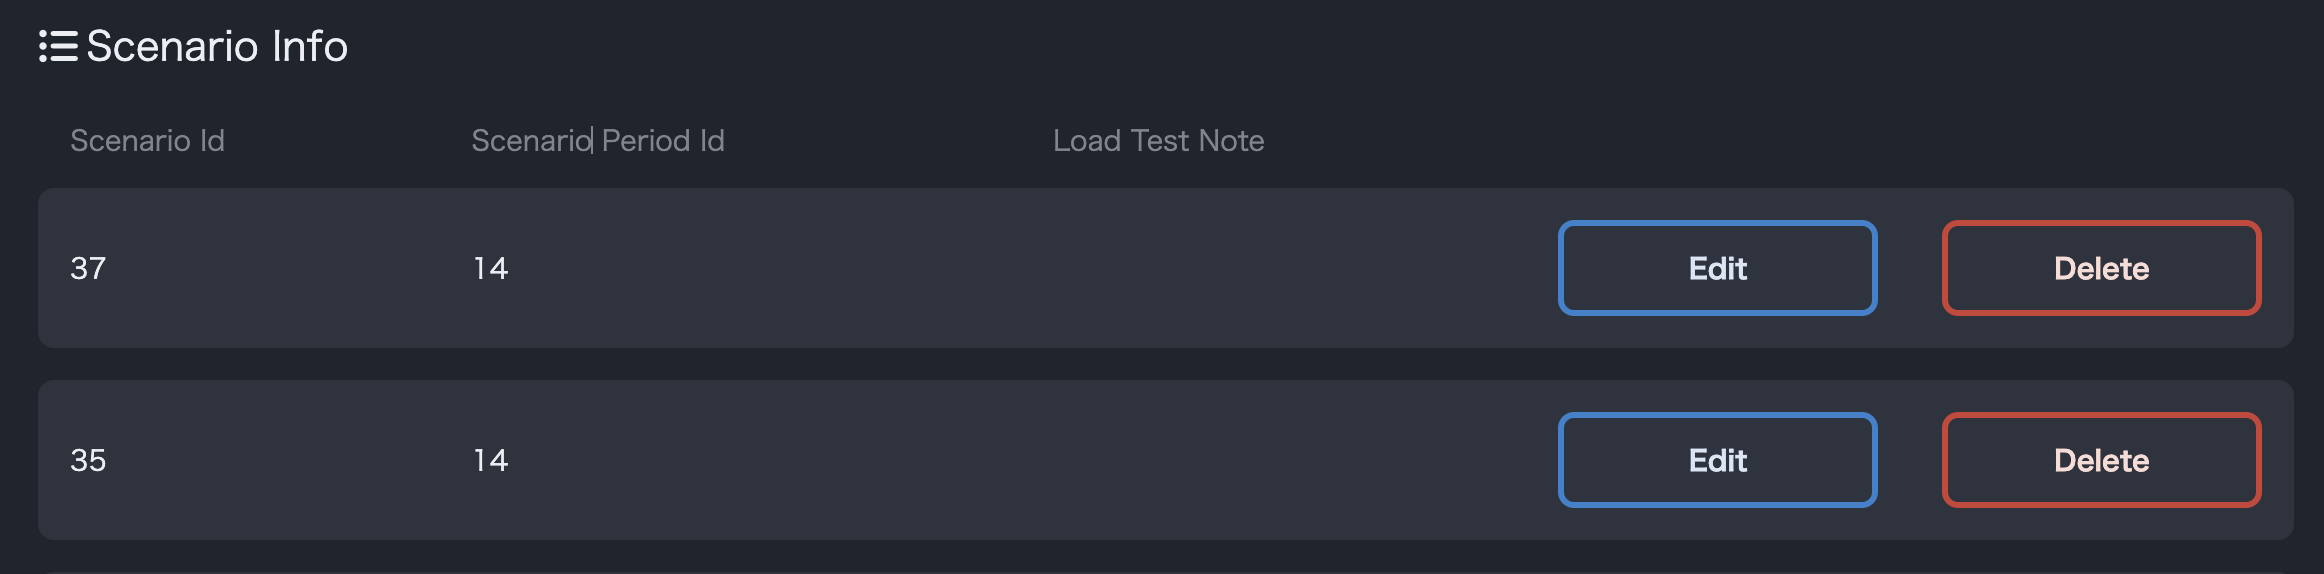
- The list of created scenarios will be displayed. The contents can be edited or deleted from here. Please refer to
"3.3.Edit scenario"for details on how to do so.
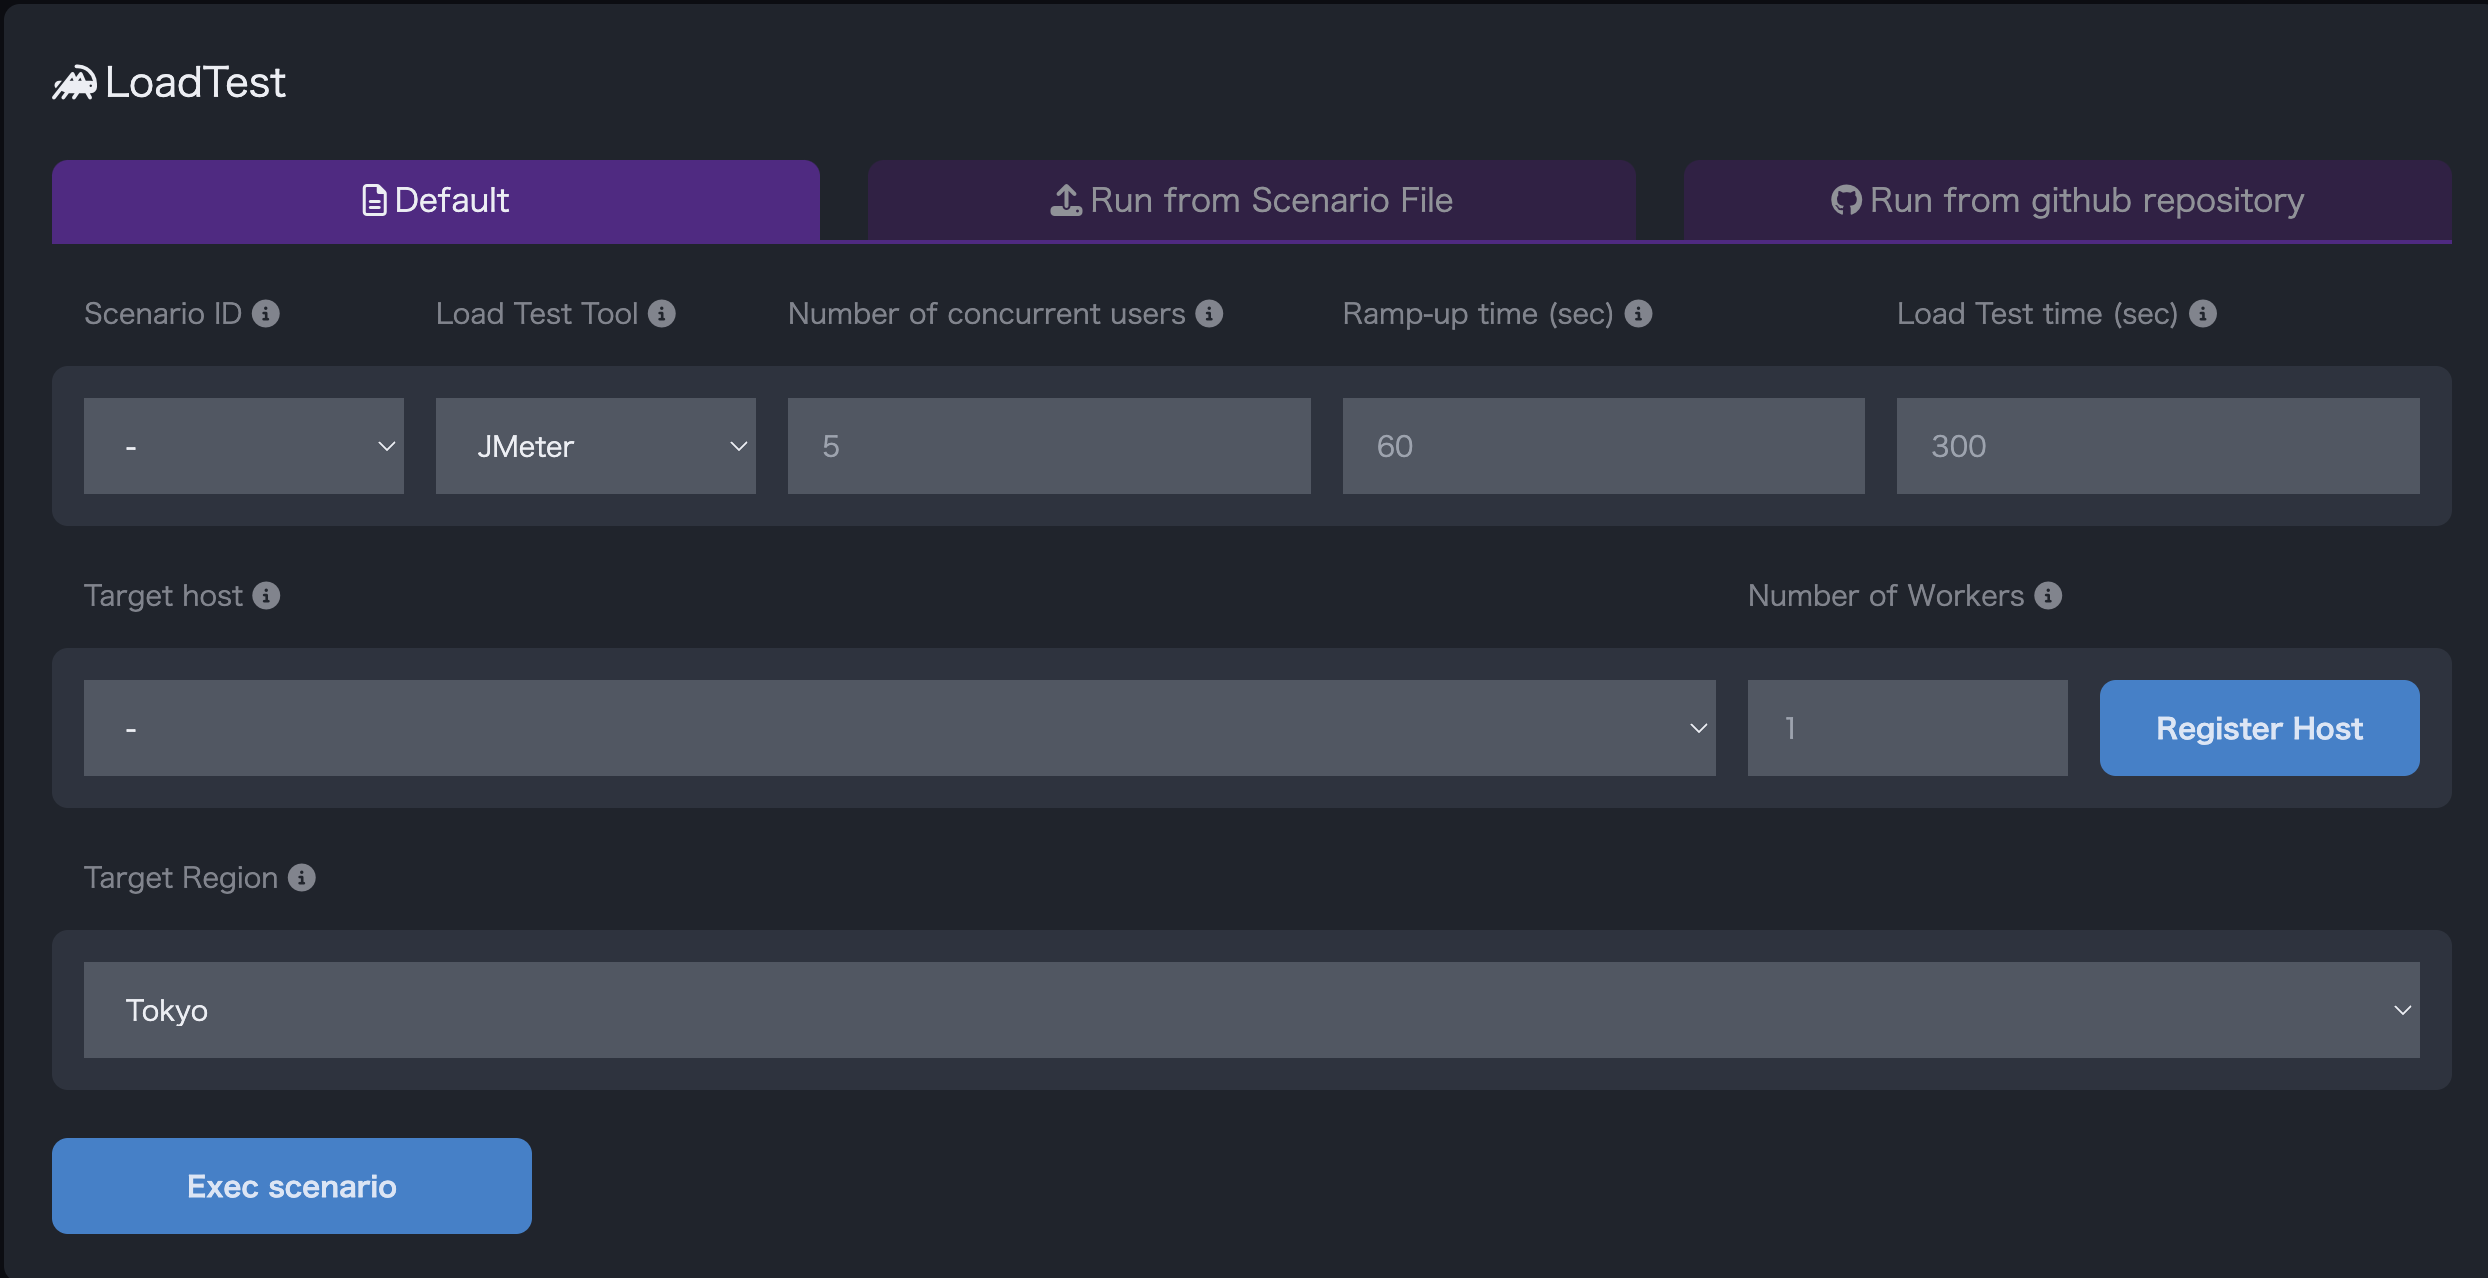
- You can perform the load test. For details, please refer to
"4.Exec load test".
- The list of conducted load tests is displayed. You can download scenario files and result reports. For details, please refer to
"4.2.Confirmation of test results".

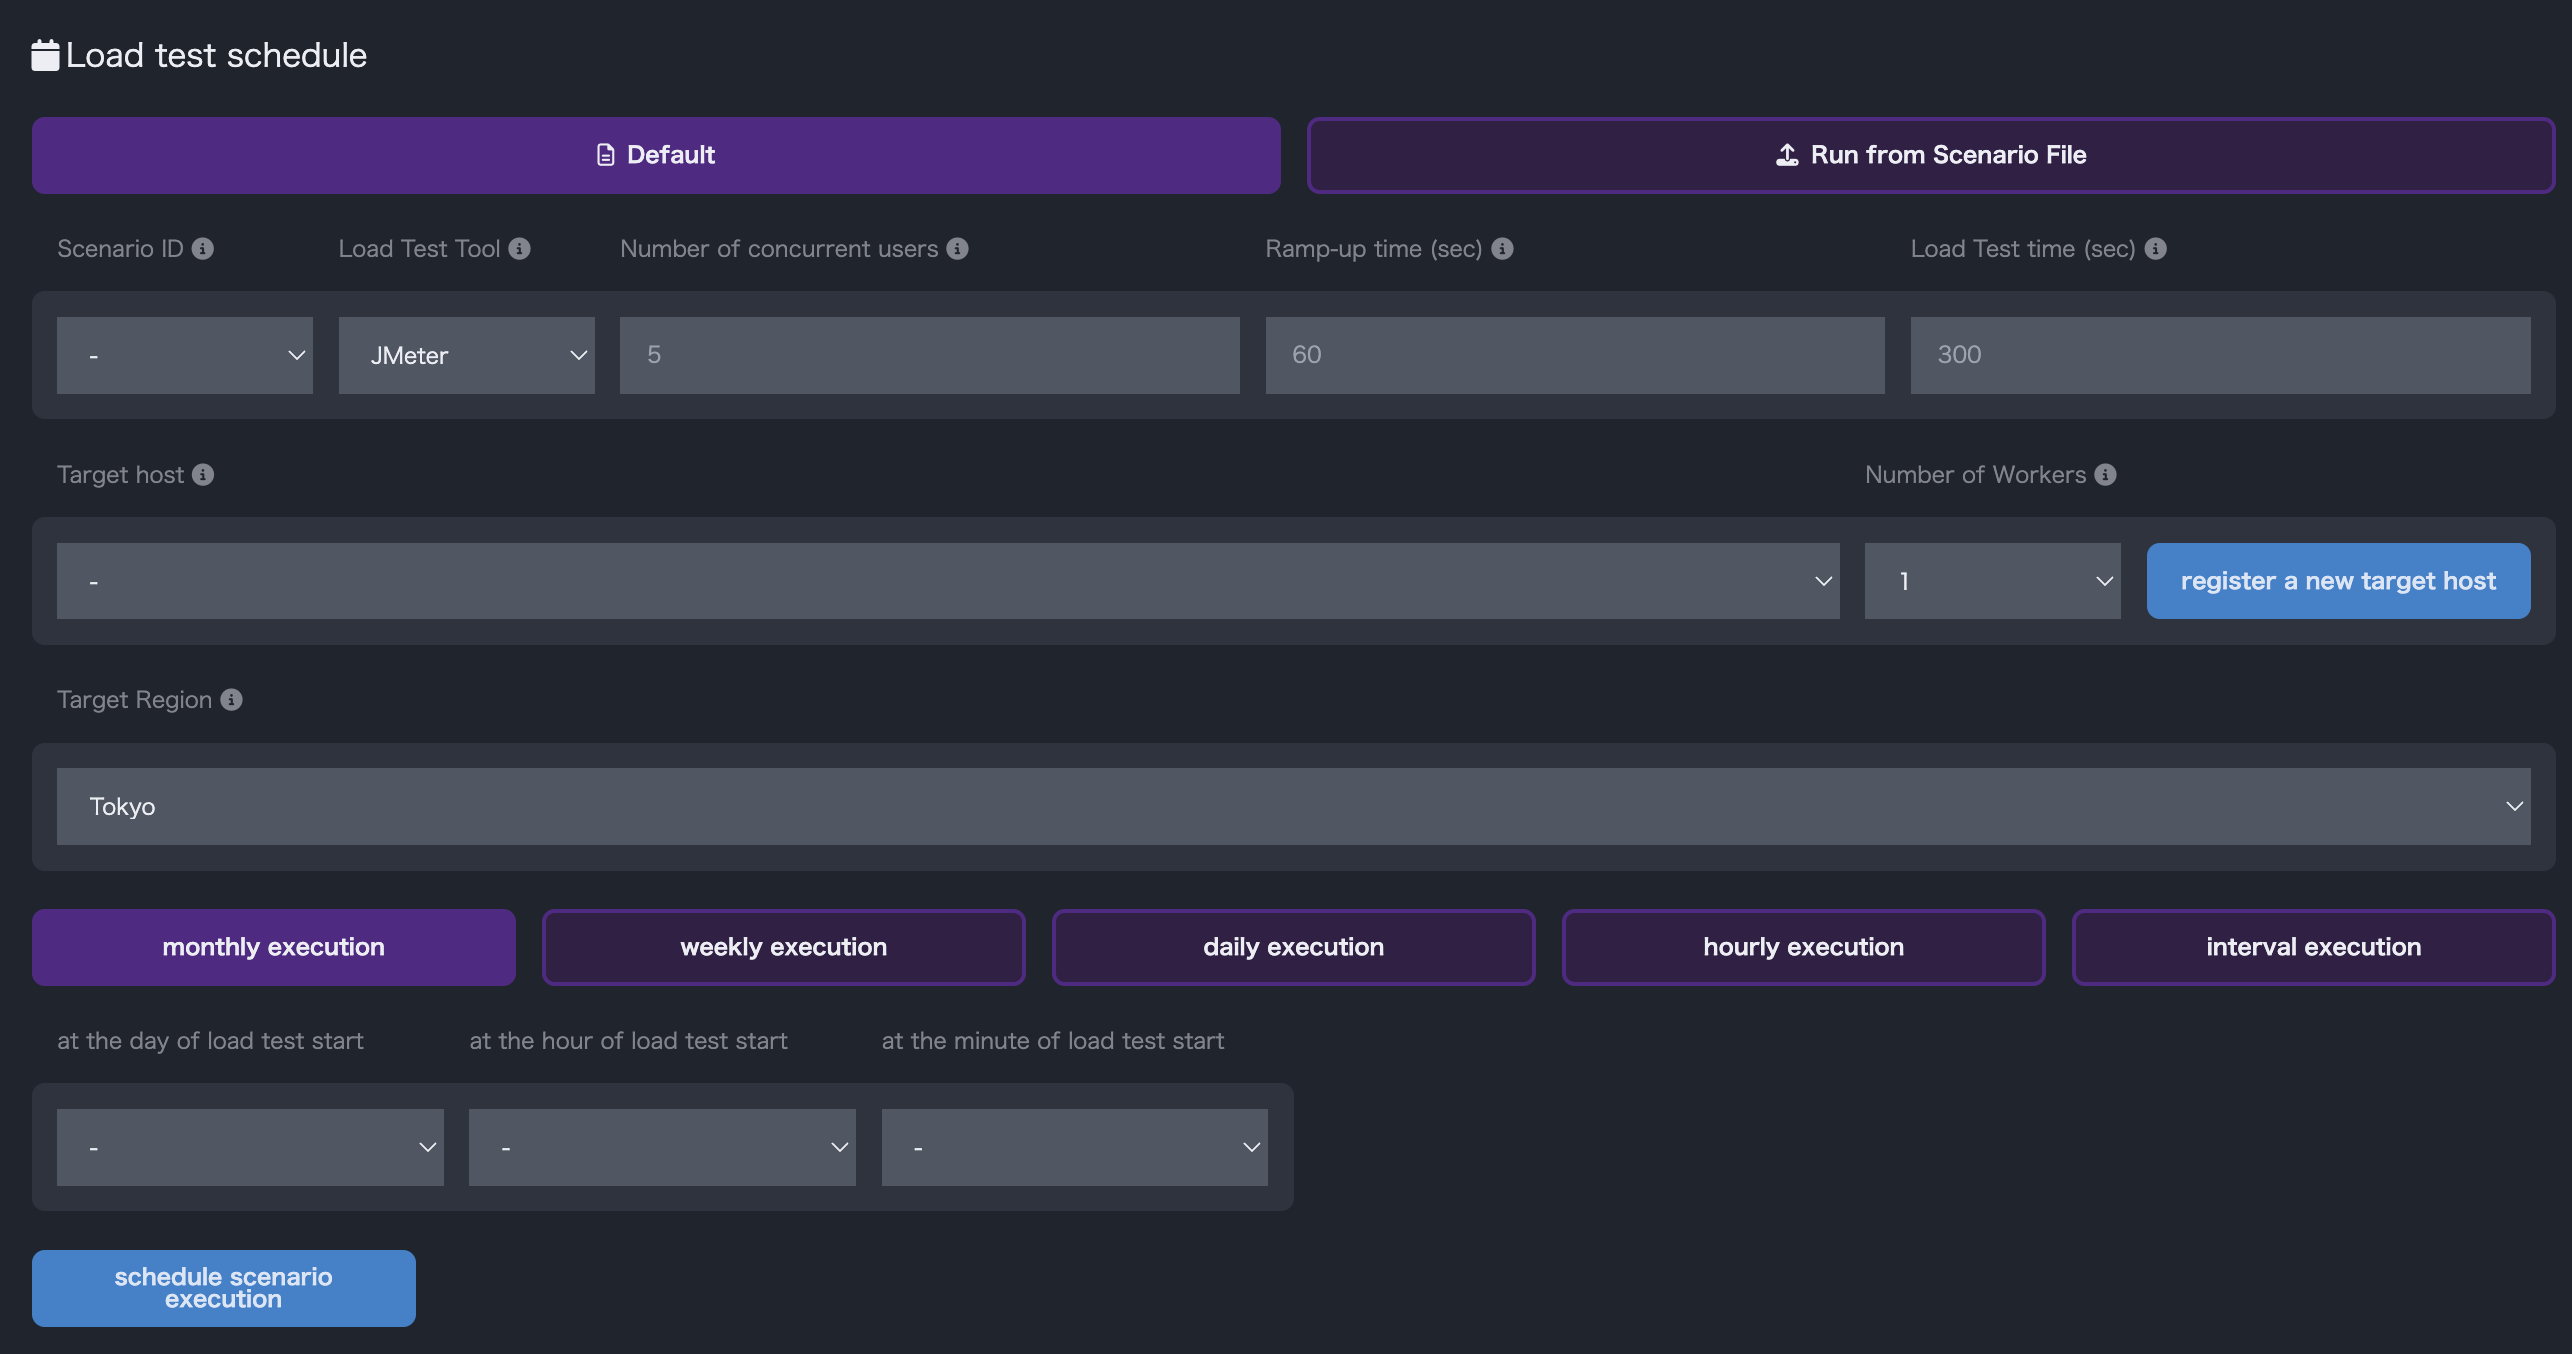
- You can register a schedule for load testing. For details, please refer to
"5.Periodic execution of test".
- The list of load tests registered in the schedule is displayed. You can enable/disable and download scenario files.

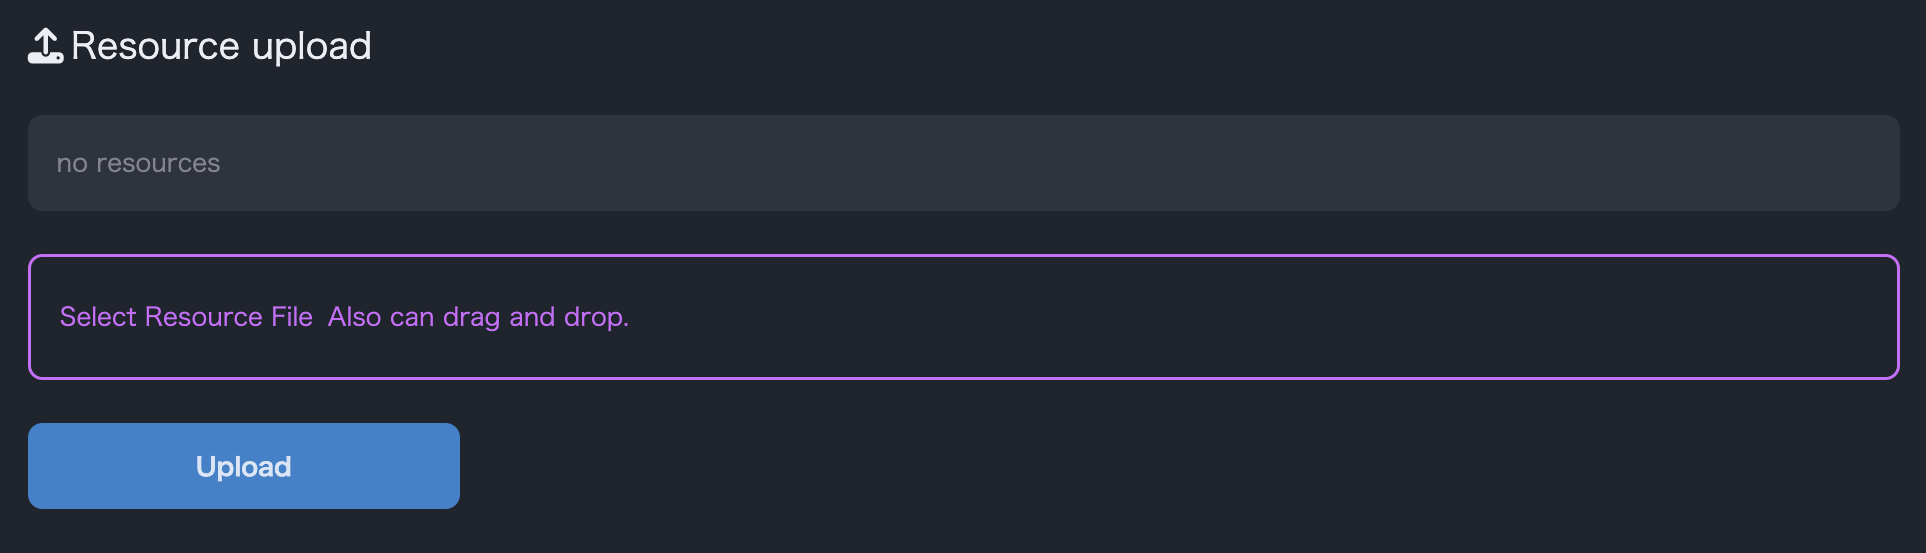
- You can upload a resource file for use in the upload test. See
"3.3.3 How to set up a scenario"for details.
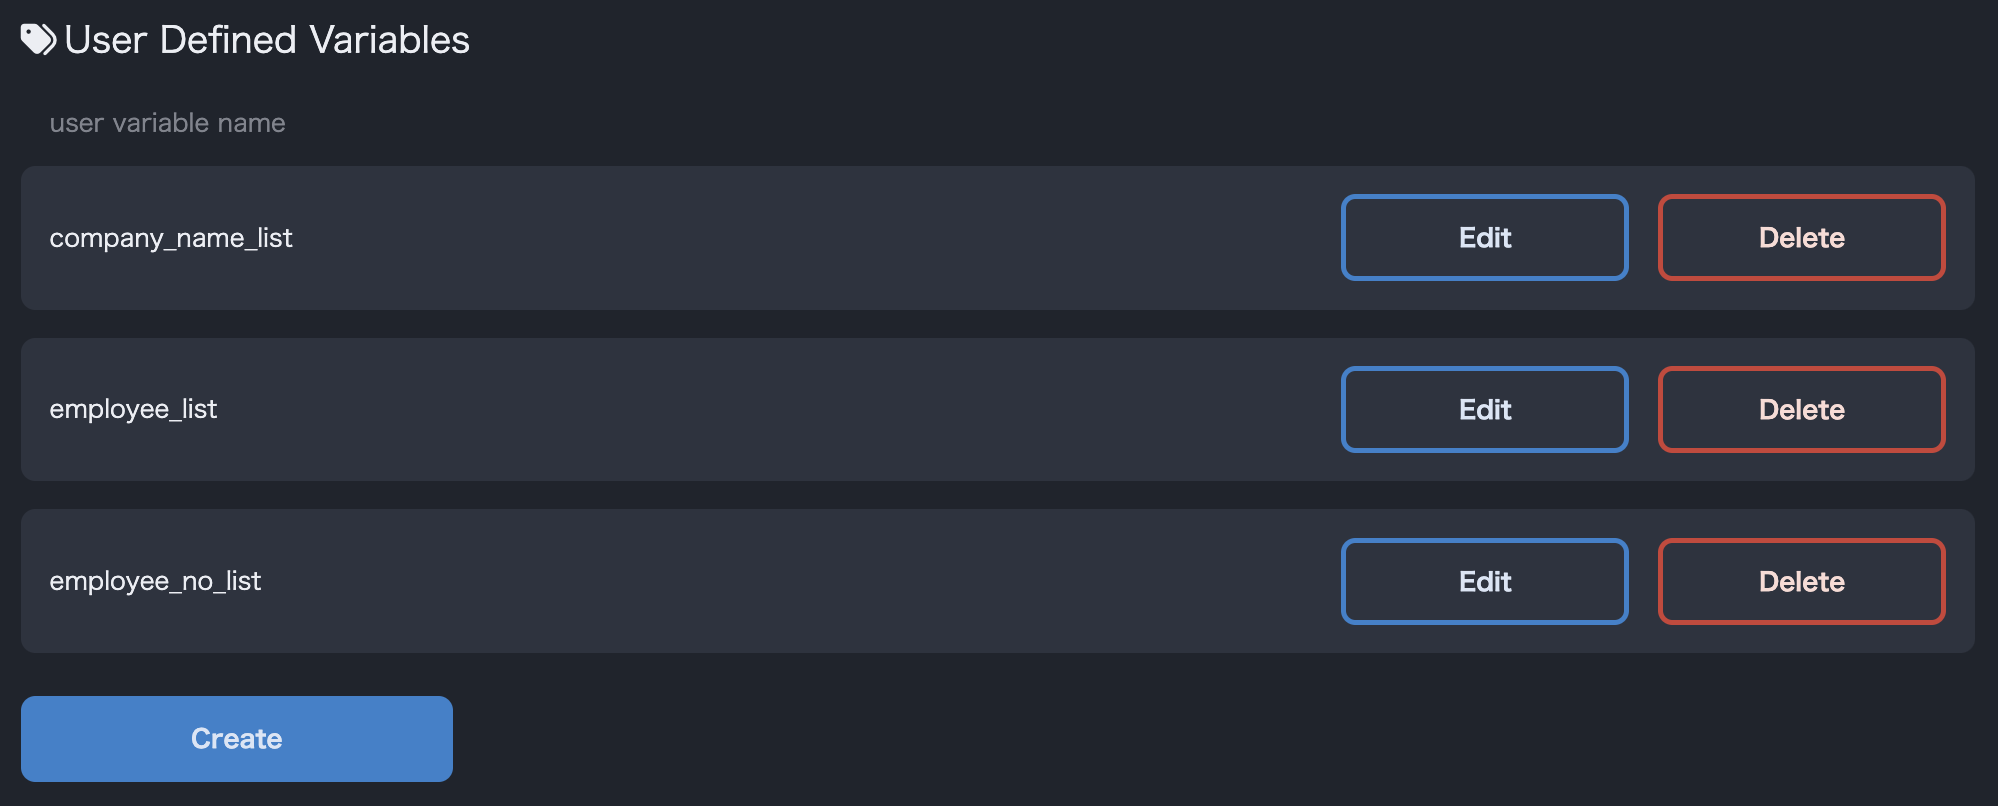
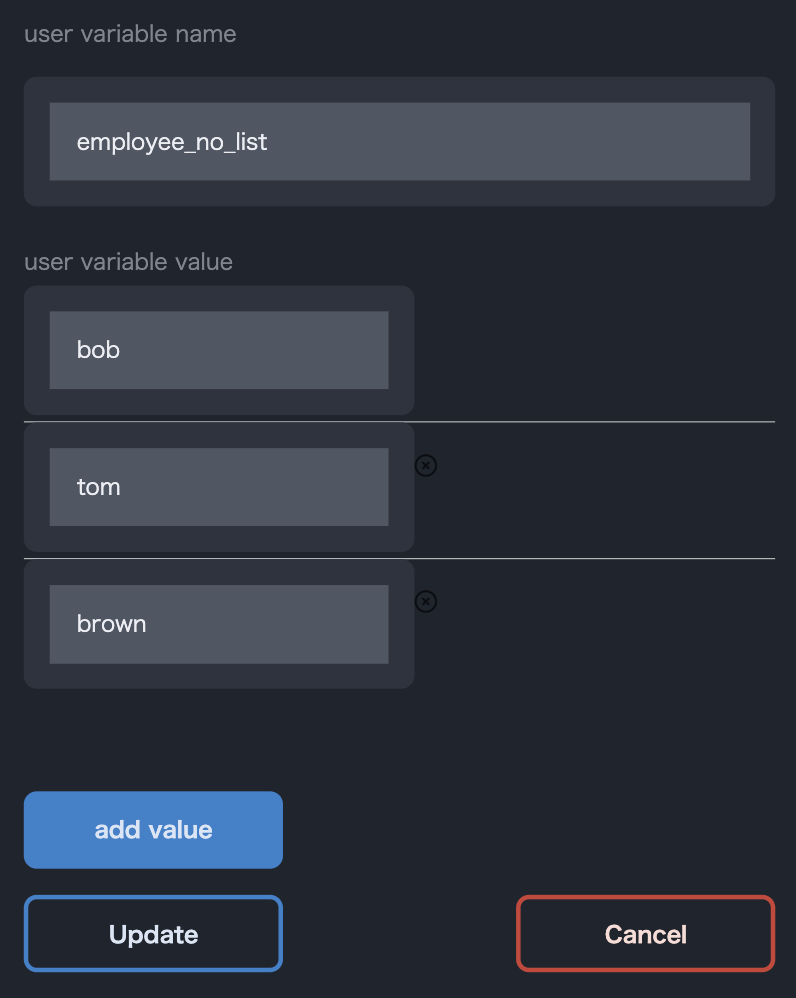
- User-defined variables can be managed for scenario customization. For more information, see
"3.3.3 How to set up a scenario".